Showing posts with label book. Show all posts

22 January 2012

A good week

Well, it has been a good week.  Fun, creative, and productive.  I am proud of myself for doing what I said I would do--got "in the studio" by 8:30 a.m., which also stopped me from going back to bed and wasting the day.  I also managed to avoid floundering about what I wanted to do, thanks to all the thinking I did in the last couple of weeks about what I hope to achieve this year.  I've got goals!  :-)  

These first pics are of the little book I cut pages for last week, mentioned in my last blog post.  I made covers for it from white presentation board.  So far I have decorated only the front of the front cover, but I was pleased with it.  The tree is from a KaiserCraft wood piece (used as a mask), and the rest of the materials used include Adirondack Color Washes, thin Prismacolor markers,  Distress Ink pads, and Sharpie poster paint markers.

I love trees, with or without leaves
Last night while occupying myself in the lobby of the Brushy Creek Community Center during the kids' taekwondo classes, I put myself to work using some of the doodle ideas from Traci's Strathmore workshop on one of the inside pages.  It was fun!  I mainly used a Micron pen, but there are a few bits of a blue Sharpie poster paint marker as well.  Adding the border transformed the page, and also I noticed again how extremely useful Zentangling has been for helping me doodle.  I do remember that I used to *love* to doodle when I was in high school and would draw loads and loads of different sizes of circles on pages . . . need to get back to that.


Doodle close-up
Another thing I am really quite pleased with is that I did something new this week:  carved my own stamp!  Traci Bautista's Strathmore workshop had me thinking about this yet again, as I have many times before, and then when I was wandering around Jerry's Artarama early last week I noticed that they had a new kit by Speedball for stamp carving.  Clearly a sign that I was meant to get it and do it!  It is one more way for me to make my art my own.  The kit came with a small piece of pink rubber block, a knife handle and two tips, and tracing paper.  I searched my drawers of stuff for a suitable image and ended up using the top of the palm tree from the Mexican loteria cards (#51).  Traced, transferred, and carved.  It was so much easier than I expected it would be!  I added the lines within the design myself.  It may not look like much to anyone else, but I love it.


On Friday I finally made a decision about what kind of book to make. One of my goals this year is to become much more familiar and practiced with different book structures. Often I get bogged down in aspects of that which I think I "should" do . . . so this time I decided that my goal was simply to practice the book form, and thus I wasn't going to add pressure to myself to embellish or create the perfect cover at the same time.   Voila--unblocked.


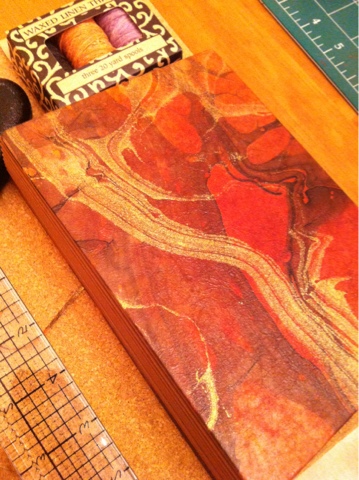
I measured and cut boards, sanded the edges, and cut paper from a beautiful sheet I'd gotten from Hollander's a couple of years ago.  I have found that I have an unsettling & probably unhealthy urge to hoard supplies for the "perfect" use, but I am coming to realize there is no such thing.  So with nary a qualm I pulled out the paper and cut it up for this project.  (With some of the scraps I even made a smaller book.)  I did not yet get to the point of punching holes in the signatures or the covers; that will come this week.

Small boards (3-1/2" square) covered
with scrap from the big notebook
My plan is to do my first caterpillar stitch.  It's not exactly clear to me how one attaches the signatures, since normally one works up from the back cover and this caterpillar appears to go the opposite way, but it did occur to me yesterday that I can do the cover stitching, and when I get to the signatures, I can just turn the whole thing 180 degrees so that I feel I am adding signatures from the back cover to the front.  Hopefully that will work.

The little book came out quite cute.  As the covers are 3-1/2" square, I cut the pages to be 3-1/4" square.  I used many different shades of Archiver's card stock that I thought would look good with the book cover:  kraft, cabernet, pomegranate splash, pastel yellow, carob cream, neutral tan, pear crush, natural, cream white, sugar cream, and fudge cover.  The point was for this to be quick and easy (and not lay around half-finished for weeks or months), so I used my new Cinch 2 that I got in a great post-Thanksgiving Day sale.  Worked great!


Finally, at the weekend I came across the site of Marilyn Scott-Waters, and from it I did the following little cover for a 5x8" ruled pad.  It was easy and took all of about 10 minutes to do, and it gave me some great ideas for making my own.  Plus it is something my daughter will like and also something she can help me do.

Front cover, added to a 5x8"
lined notepad from Office Depot
The inside has a pocket;
I covered up the Office Depot logo
as best I could with lace tape

So upcoming this week I seem to have lots of social engagements and not that many days of uninterrupted creative time.  Thus I am setting goals that I think I can accomplish without pressurizing myself:  do the last week of Traci Bautista's workshop, and complete the caterpillar book.  Ought to be able to get my head around that!

25 January 2011

Reorganizing; Fixing a Perfect-Bound Book; Watercolor Journal with Beaded Spine

As mentioned, I turned my stuff upside down last week to put it back together in a new and pleasing way--then I've spent the last week looking for stuff I cleverly put somewhere new and now can't remember where it is.  I'm getting there though (the last ten percent of stuff is always the hardest!) and am very happy with the effort.

Of course I know I'll do this all again next January, but that's okay--it's a valuable reset for me and an excellent opportunity to think about what I want to focus on for at least the next six months (or rather, until the school year ends for the kids) and arrange my stuff in order to best facilitate that.  I get a chance to be reminded of supplies/tools I acquired during the year and to remember things I got longer ago and had forgotten, plus I look at things in new ways every January since I am still learning and discovering so much each year.

I am nearly done with my journal that I keep talking about here but haven't shown any pics of yet because it's just not quite finished.  Yesterday during my kids' taekwondo lesson I messed around with different ideas for the pockets, and I think I've come to some decisions.  Sometimes I feel so paralyzed with what is, I suppose, ultimately a lack of confidence.  I just want to be so sure before I cut anything, but I am learning that even the mistakes or things that just don't work out can always be used in some other fashion, and reminding myself of that helps break through the weight of inertia.

One other thing I started working on this week is fulfillment of an obligation to my son's school.  They contacted me back in October, saying that one of the Harry Potter books in their library had sections coming out of it, and did I think I could do anything about it?  I said I'd be happy to take a look at it but couldn't get to it until after the holidays.  Well, that time is here, so I hauled it out and examined it.  At first I was hopeful as it looked like the pages were sewn signatures, but I soon realized that unfortunately, what I was looking at was a perfect binding.  I got on the internet and confirmed that the HP hardbacks are just that.  Bummer.

Spine after pages had been separated
and most of the perfect binding glue removed
So I looked through all my books that I have on binding, and nearly all of them said to kiss it goodbye as there wasn't anything to be done to rebind a book originally done with perfect binding.  However . . . Manly Banister did offer one method to try, so I am giving it a go.  Basically, you clean up the spine of the pages, glue them together lightly again, then separate into sections and whipstitch them together.  If there's enough space left in the gutter then it might work.  I figure it's worth a shot since the school has no other options, and it's an interesting challenge.  So far I've cleaned up the spine and glued the pages back together in preparation for separating into sections.  Later this week I hope to separate into sections and punch holes for sewing, then on a long day, I'll settle in and do the whipstitching.  I should know by about halfway through if it's going to work--those Harry Potter books got big towards the end.


Spine after trimming off the ragged edges using my
Purple Cows guillotine, four pages at a time
Finally, today I found myself beset by the paralysis described earlier.  I need a journal with 140 lb. watercolor paper in it so I can finally get around to doing the Pam Carriker lessons from the Strathmore site (I don't think anywhere in town sells the Visual Journals, and I'm too cheap to order one online--plus I thought it would be nice to make my own).  At first I thought about doing the longstitched cover described in real life Journals by Gwen Diehn, but that just looked like too much work, and even after poking through my papers I still couldn't find ones I wanted to use for the covers.

A four-signature book made with Strathmore 400 Series
watercolor paper, 140 lb. (finished size 7.5x11")
So I ended up going with the multiple-signature binding described on pages 88-91 of Alisa Golden's Expressive Handmade Books.  I didn't even put a cover on it--the paper is so stiff that I decided it didn't need one, and it's just for me to play in anyway, not for show.  

(Forgot to mention the paper--yesterday I picked up on 40% off sale at Michael's a 12-sheet pad of Strathmore cold press watercolor, 400 series, 140 lb., 11x15".  I cut the sheets off the spiral binding and then trimmed with my guillotine before making 4 signatures of 3 pages each.  Before folding the signatures, I did turn the middle page of each the other way, so that every spread has the same side of the paper rather than one side being rough and the other smoother.)  

I did add some beads along the spine, just because I wanted to.  Very pleased with the result and looking forward to finally doing the lessons now that I have somewhere to glue my cut-out copies! 

 
Middle section of spine sewing with beads

Top section of spine sewing with beads

18 January 2011

Semi-stalled but still doing things

My time has been very productively spent doing both arty things and practical things--still cleaning up the house and our stuff from the holidays, and reorganizing my supplies to better accommodate all the crap (excuse me, valuable materials!) I've acquired over the last year and to facilitate the things I want to focus on for the next few months . . . book-making and journaling.  So I haven't posted anything because I don't want to take the time to take pics, upload them, edit . . . next thing I know an hour's gone by that I really needed to be doing something else.  But I think this week should see the end of that and I can get back to a more regular schedule.

Part of my problem moving forwards is that I apparently haven't fully committed to a decision about how to  put in the pockets to hold the tags/slips of paper that I jot down my ideas on.  Do I use library pockets with an extra accordion fold to hold plenty of tags?  Or just a little envelope?  And what size tags do I want to use anyway?  I was thinking of making the holders/envelopes out of Graphic 45 paper--am I going to want to do something to more fully incorporate that paper in with the hand-painted papers I used for the book pages?  And if so, what is that going to be?  (I did get some Glimmer Screens and an enormous Tattered Angels dragonfly stamp today with my Archiver's coupons with the thought that might be part of the solution.)  

As you can see, there's plenty whirling around in my head at the moment.  I feel sure that within the next few days, I'll realize what the answer is and get it sorted.  And here I thought sewing the book was going to be the toughest part!

In the meantime, I have gone through all my supplies/materials and reorganized between my public space in the dining room and the overflow space in our utility room; made thank-you cards using my new sewing machine for our English family that we can all sign and send off this week (it's not too late as long as they arrive before the end of January, right??); installed Photoshop Elements 9; done some experimenting with the masks and various sprays that I have; continued to mess around with the 1st workshop of Pam Carriker's through Strathmore online; and generally felt that I am getting my life in order so that I am free to devote some hours to these pursuits without any guilt whatsoever.  It's all good here!

31 December 2010

Last post for 2010, sneaking in under the wire

Tonight my son is spending the night at a friend's and my husband is playing a gig an hour away, so my daughter and I stayed home and painted papers (she helped me a little bit).

Last night I tried to settle and do something but was just not able to do that, so instead I made some notes in the new little Moleskines I got for Xmas, did my first read-through of my first Mary Oliver book of poetry, and looked through some of 1000 Artist Journal Pages.  While I read I made notes about many things and ended up having a great & fulfilling evening even though it wasn't what I had thought I was going to do at the beginning of it.

I got a great idea about keeping lists so that I can keep up with my life instead of it getting away from me.  I also think this will help keep my list-making side in check and not let it get out of hand so that I end up just feeling bad about the things that aren't getting crossed off my list--because this book won't have things to cross off!  Right now I don't want to say much more about it, but I hope to complete it within a week and will do a full post/explanation then.

Tonight in preparation for making the book, I painted pages from a Dale Rowney acrylic pad (115lb paper, canvas style on one side and smooth on the other) with Golden Acrylic paints--begain with Cerulean Blue Deep, then some Turquoise (Phthalo) followed by Cobalt Teal and finally Phthalo Green (Yellow Shade) mixed with Acrylic Glazing Liquid (AGL henceforth).  I moved the paint around with various items--brayer, my fingers (in gloves!), a palette knife, a paper towel, or a paintbrush.  Over all that I put a layer of Titan Buff mixed with AGL to tone everything down.  The pages aren't finished yet--I'll still add some circles and patterns, probably with acrylic ink in hopes of reducing the sticky page factor.


I would like to thank everyone who has been kind enough to leave a comment on my blog this year.  There are so many wonderful blogs and artists out there, and it's impossible to comment on everything, so I really appreciate the effort made when someone stopping by does leave a note.

Happy New Year to everyone!

09 November 2010

"Courage" Portfolio Cover and Small Notebook

Well, so much for my attempt at posting once a day this month (much less doing something artsy each day and writing about it!)--but I'm not unhappy or disappointed.  I'm proud of myself for that!

My mom was visiting for five days (whirlwind trip that included attending an outdoor performance of Hamlet under an oak tree on the edge of a graveyard as well as the opening night of La Traviata), and trying to fit all the other stuff in simply wasn't going to happen.  But I did feel that I was creative every day--on both Thursday and Friday we played our duets together (Mom on tenor recorder, me on a folk harp), and on Wednesday and Sunday I prepared nice meals for us to share.  Sunday evening, her last night, I made risotto with carnaroli rice and fresh parsley & dill, topped with roast chicken and drizzled with an aged balsamic sauce.  One of my favorite dishes--visually appealing, healthy, and delicious.  Then today I had to spend a lot of time doing finances with my husband; not any fun, but necessary, unfortunately.

So I am going to post up about a couple of notebooks that I made at the beginning of the summer for my cousin who was both turning 18 and graduating from high school.  She has had a difficult childhood and IMO never got the support she needed from either her parents or the school system, and it's a testament to her strong will that she is still here, frankly.  But I find it difficult to talk to her (always hear in my head how stupid I sound trying to talk to a teenager when I'm forty with two kids) in person, so I tried to put all my feelings, hopes, and emotions into what I made for her.

As always, I didn't have enough time, so they aren't very complicated.  The saving grace is that everything was done by my own hands--at least I hope I can lean on that :-).

For one item, I made a portfolio cover (inside it holds manga illustration pads, since she is writing cartoons but has others do the illustrations), and the bookplate design I crafted in Photoshop Elements.  I used scans from some old diary pages of hers and then wrote "COURAGE" over the top.  The cover is painted with Lumiere paints, and I affixed a great multitude of carefully selected talismans and embellishments to the book rings.

I also made a smaller notebook that would be easier to shove in a backpack.  It has painted grungeboard covers (I mixed up a custom shade of purple--her favorite color, again using Lumiere paints), and for the little special touch, I put some origami paper behind the keyhole decoration.

My hope is that she spent time at some point looking at all these things and knowing that I made it for her.  I haven't heard from her about them, but my guess is that 20 years down the road she'll say something about it.  It's okay that she hasn't said anything, too.  I probably wouldn't have at that age either, and anyway, that's not why I made them--to hear a response.  I made them because I needed to give them to her, end of story.

30 September 2010

Hodgepodge Journal list booklets


My son's middle school class is going to do visual journaling all year long--how cool is that? The teacher asked me for assistance way back in the middle of the summer, and what began as a limited decorate-the-journal-cover project blossomed into a full-blown study of journaling that then got distilled into presentations for the kids. Did I ever learn a lot!

I'll talk about the journaling more in a separate post, though. Here I want to show the list booklets I made for the kids. When discussing the project with the teacher, we agreed that the first thing to do to give the kids somewhere to start was with a list-making activity . . . and that got me thinking that it would be great fun for them to be writing their lists down in a booklet that started their brains thinking about their own visual journaling pages. Much more inspirational than writing down on another sheet of lined notebook paper!

So one evening while the kids were watching a movie this summer, I set up on the kitchen island with Canson Biggie sketch 14x17" paper and my acrylic inks, and I went to town. It was such a hoot! I made sure to use different color combinations on each sheet and also did the front and backs different ways. Probably I did about 4 sheets front & back.


I decided that the booklets would be 5x5" and sewn pamphlet-style. They would be a combination of the painted papers and plain white paper, but on the plain pages I would add a couple of things--that ended up being one flap that opened up to write on and one envelope with a small set of papers (made from the trimming scraps) inside it.

The end result was 13 booklets that were unique--the kids loved them and were very careful to store them in their lockers when done instead of leaving them around their desks or on the floor.


Finally I decided that I should also make my own booklet so I had somewhere to practice writing on the painted papers with different inks.


Not that I had much time to do it in--this was about 11 p.m. the night before presenting. I grabbed one of the free sheets from a Somerset Studio for the cover, and then I took all the remaining scraps of a decent size and put them on the insides (no pamphlet sewing for me--too late at night!).


I really, really wanted to show the kids how wire could be used, so I whipped up a quick booklet of single sheets and wired it onto the cover. Totally my favorite part! I love the wired-in booklet.


The last thing I did was to stick a packing tape transfer on the cover. I do like it, but eventually I will trim it more closely to the figure of the woman so it doesn't look quite so much like, well, packing tape.

24 July 2010

By the Ocean, a circle accordion book

I have had a lot of fun doing a circle accordion book, although at the very end (it figures!) I am running into some unexpected issues, but I'm sure I'll come up with something, right?

To start with, I applied Daler Rowney FW acrylic inks to a 22x30" sheet of Arches 140-lb. watercolor paper using brushes. Towards the end I switched to a stencil brush and was happier with the results. I went a little darker overall than my original intention but managed to lighten it up & unify everything at the end by putting a layer of Silver Moss over all. For the most part, I used pearlescent inks but did use a bit of two regular ones for some contrast and increased interest. They mostly got covered over with the pearlescents but still served their purpose.

I then cut the strips up to make a cover and four strips of internal pages (finished book measures 6" tall by 5-1/2" wide). Took a little bit to work out some lines about how the ocean makes me feel--nothing to change the world but meaningful to me. Practiced my handwriting in a journal and then made moves to put the words in the book.

Here is where I have gone astray a bit! I did the responsible thing and put light pencil guidelines on the paper so my writing would be straight, and then I wrote with a Pigma Callipen, but it is NOT permanent ink. So when I went in to erase my pencil guidelines, the ink is disappearing too! Right now I'm deciding whether to go in and cover up the pencil lines with charcoal pencil, which actually might look pretty nice to ground the words, or go with the erasing effect and have it look like the tide coming in and erasing marks left on the sand.

Later . . .

I tried using a charcoal pencil on some of the scraps of paper and was not taken with the result, plus the thought of having to mess around with a fixative and even then I'd probably get facing pages rubbing onto each other . . . no, I think not. Plan B went into the effect with the eraser, and I LOVE IT! The ink looks better not being so black, but since I did it bottoms up on the words, it really does look like the sand and the sea breeze have been there working their magic on the scribblings. I know that the whole thing would probably be even better if I did add something to ground the words with, but I'm not confident I can do that without messing it up, and right now I like the overall effect of the words floating in the sea. So there.


All I need is some self-adhesive linen hinging tape to attach the pages together. Once that's done, I'll take pictures and post them up.

14 July 2010

Life as Geometry: Shorts Book with Origami Pocket Envelope


Too much fun! While my son had his fencing lesson next door, I sat in an empty classroom and made a little book. Following Alisa Golden's excellent instructions in Expressive Handmade Books, I made a little Shorts Book out of notebook paper and colored a rainbow spiral on it (I could definitely see that making this with double-sided paper would be very attractive indeed).

Then at home this evening while watching the Tour de France (taped from this morning), I quickly wrote a few silly lines about circles and got enough for the four pages of the book. Took just a few minutes to write them in, and then about another five to cut a strip of paper from an oversized art calendar that my aunt Margaret gave me and fold an easy pocket to hold the book. I love it! Ms. Golden's folding instructions and accompanying diagrams never got me lost, and as I am quite spatially challenged, that's a feat worth mentioning.

The book style is preferable to the instant book I did earlier; the page thickness doesn't get in the way. Or perhaps that's because I was using such thin paper? I'll have to double-check that with thicker paper when I do one with more thought.


Running up a quick prototype--as that's what I viewed this as--was extremely useful. It will be a great example to show one's students why one needs guidelines on the paper for writing, it helped me decide which style of writing worked best within the book and with the words chosen, and I realized that I really needed to treat the facing pages as one long spread rather than separate pages (which would be my preference).

09 July 2010

Back from Vacation

Today the kids and I got back into town from a wonderful couple of weeks spent at my parents' place in rural Kansas. It is always a restorative trip for me and the children too. I never do get much time to actually do things of my own, so I have learned not to lug along a whole lot of stuff thinking I'm going to get to play more than at home, but I think the enforced break is a good thing. There is also usually a visit to either the Utrecht store or Creative Coldsnow's Westport location, both in Kansas City. I was quite pleased this visit to find the Golden Van Dyck Brown in fluid acrylics there, which I have been looking for--I know I could order it online, but it's just so much more fun to pick it up in a store and walk out with it.


As I said, I didn't get to play with actual materials much, but I did manage to find some time here and there to do some of the projects in Susan Tuttle's book Digital Expressions; the images with this blog post are a couple of the results. The building is the one-room schoolhouse that my grandfather attended as a boy; it's just down the road from my parents' farm. The other abstract image was lots of fun to play with, and there were no brushes to wash up afterwards!


I did spend some time thinking about what I want to do over the next few months and realized that I don't have any free time if I do everything. One decision I need to make is whether to sell any holiday cards this year. If I do, I need to get cracking on those, get them posted up on my shop site, and fulfill the orders pronto. I also have to decide if I'm really going to offer an after-school book arts class at my son's school in the fall. (I offered it halfway through the spring but it didn't make.) That's going to take some work to pull together as well.

Other projects in my pipeline are doing something with the painted papers I did before leaving on vacation and finishing the Renaissance triptych book that's been lurking for some time now. I also saw something in the latest Cloth Paper Scissors (I think) that I would like to send in an entry for--a book limited to no more than 6x6", if I remember correctly.

I was also contemplating what to do with the 7gypsies printer's tray I got recently (shame to let those Archiver's coupons go to waste, even if I don't know what I'm going to do with something yet), and I thought it might be fun to do some of the ideas from Mixed Media Self-Portraits and do one in each tray. That's a pretty large undertaking--unless I purposely made myself do it in time limitations. Guess it depends on why I decide to do the project--practice doing instead of thinking, or really delve into the self-portrait concept . . .

And on top of all those things, I forgot to mention that I wish to finish the projects in the online Complex Collage class that Julie Prichard & Chris Cozen are offering . . .

Much to think about, and much to do!

19 February 2010

Ongoing Projects

I have so many things to do I thought I'd better make a list:

1. Finish "Bathtime" piece
This requires continued messing around with it. I think I am on the right track--this evening I painted interference violet and blue paints over both the clear granular gel and the black background, and it ended up reminding me of wisps of steam rising up in a hot bathroom. The rivulets of clear granular gel remind me of the condensation that forms on the mirrors and drips down. I think the "bubbles" are going to work out all right with the glass balls over them, but I'm not sure yet. Should I put some kind of border around the circles--and if so, what in the world would it be? And how to adhere the balls to the piece is yet to be decided. I am going to need to paint some overall covering over everything too, and I need to decide what that will be (soft gel, heavy gel, gloss/matte/satin, etc.). Finally I have to decide how to integrate the nude woman panel into the whole thing. Using glass mosaic pieces at the corner of both the small panel and the large one does a good job, but I need to decide if I should add some blue & purple swirls into the fog at the bottom of the inset panel, or if I should add just a few streaks of interference red paint to the larger background panel. Or what the heck--maybe both!

2. Finish two fairy canvases
I have the idea of wrapping each with wire and having crystals strung on the wire. That's also how I could attach the bottle with glass shards inside to the piece. Also need to put a couple of layers of gel medium over them.

3. Complete house accordion book
The cover is done and the signatures are sewn in, but I need to add text to them. I think I'm going to put stuff in from Alain de Botton's The Architecture of Happiness. I need to decide what the test is, lay it out on the page, and execute it.

4. Complete Renaissance women's triptych
The triptych itself is done, but I need to make a final decision on the paper for the signatures, choose the embroidery thread for sewing the signatures, create and add text & illustrations to the signatures, and sew them in (must also choose beads to cover the spine sewings). I think I'm going to use the Katherine Phillips poems, because its weirdness is useful to demonstrate the small box that women used to beat their wings against, some more successfully than others.

5. Finish off the little blizzard books I made a few weeks ago. They need covers (or to be incorporated into something larger) and text on the pages. I haven't thought about these much so am not sure where I'm going to go with them.

I'd really like to wrap up these projects so I can think about the new book styles I want to try and also figure out some different ways to use the beautiful chiyogami papers I received for my birthday last week. I am now a proud members of those in their forties! And happy to be there.

06 February 2010

House book--folded accordion with pockets and sewn signatures

I started with a leftover strip of paper from making an Inventor's Journal for my son. When I had folded it into an accordion, it seemed a bit tall, so I decided to fold it up from the bottom to make pockets. Got to have something to put in the pockets, so I tore another strip of leftover paper (Strathmore 400 drawing paper for all of this) into variously sized panels and put two in each pocket. Then I tore some longer strips and folded them into two 2-sheet signatures.


Using Tea Dye Distress Ink and the ink applicator Tim Holtz likes to use with it, I applied the ink all over the accordion and the panels. I wasn't sure yet what I wanted to do with the signatures so left them alone.


I used the General's Classic Sketching & Drawing Kit that I had with me to make three circles on the front cover, using a pale pink, a dusty rose, and a hint of blue. I grabbed a paper napkin (all this so far done in a coffeeshop) and smudged it. Then I used charcoal to draw a house outline on the front. (I did practice on some scrap first.) It looked a bit plain and clearly needed something on the front. As I experimented with adding a door, it was immediately clear that I needed to draw an open door. Very pleased that I could figure out how to do such a thing, I did it and then added some marks to the roof. It ended up looking like a thatched roof. The only way in is through the door, which stands invitingly open.


When I got home, I glued the edges of the accordion pocket shut with a very fine application of Matte Accents (it was easy and to hand). I had thought about sewing them shut but decided that is for another book--I didn't want to add the stitches on the front cover.

I added some yellow and white with the pastel chalk pencils to the house, then I added some Dried Marigold and Tattered Rose to the inside pages of the accordion. I left the loose panels and the back of the accordion with just the Tea Dye.

Some content was called for--I couldn't put it off any longer. I decided that this was going to be a book just for me, rather than something on the level of a gift. Reading The Architecture of Happiness, by Alain de Botton, had such an impact on me that before I returned it to the person who'd loaned it to me, I had to go through the whole book and write down the sentences that moved me the most. There were a lot of them! Also this summer one of my goals was to learn to use Photoshop Elements. Combining these things into a book seemed just right, somehow.


So I imported photos, some from royalty-free web sites and others that I or my mom had taken, fiddled around with layers and such in PSE, and then overlaid the image with a quote from the book. I guess this has really turned out as a contemplative or meditative book for me, because I love to pick it up, thumb through the little pages, and read the quotes. My thought for the slips of paper in the pockets is that I can use those to write down notes about things I'd want in my fantasy house. The end result is pretty simple, and if I were going to turn it into a gift book it would need some things added to it, but for myself, I love it.

30 January 2010

Paint-Sample Album


Tonight I made one of the books out of Re-bound--the paint-sample album--with an eye towards doing it in the book arts workshop I might teach at my son's school (if anyone signs up for it!). It took me about an hour and a half from beginning to end, so if I want to do the whole thing in one session for the workshop, I am going to have to prepare some of the materials ahead of time--probably cutting the paint samples and sheets would be the obvious thing to do. I wanted to use this as an opportunity to get them familiar with using a paper trimmer though; maybe I'll figure out where I can fit that into an earlier class and just save them until we are ready to assemble the book. That's a good idea . . .

I didn't have the right hardware for the top so had to use brads until I can make a list to get the right stuff. It looks pretty cute and I think everyone will like the hinge on the top cover. I made some mistakes and judgment errors, which is good--I'll be able to point them out in class and use them to demonstrate certain things.

It was fun to go start-to-finish on something. Having the possibility of leading this workshop in front of me is doing wonders for my activity in the studio. I always did work better with deadlines!

28 January 2010

Instant Book: "There is a Pleasure . . . "


When the Muse visits, she blows in, makes herself at home, and refuses to leave until she has said what she's got to say. Goodness!

Yesterday I followed Esther K. Smith's instructions for making an instant book; I used a sheet of 8-1/2 x 11" brown kraft paper. So cool! I realized that the acrylic skin weaving I did (that was not at all to my liking) actually looked great on the front cover, so I glued that down with Matte Accents. Then I thought that the skeleton leaf that came packaged with wood-grained chopsticks that I put in my stocking this Xmas (I'm pretty much responsible for my own stocking stuffers and table presents) would be the perfect thing to put over the weaving, and that turned out to be the case. I put a very thin streak of Matte Accents along the spine of the leaf and adhered it to the weaving.

Then I searched for a nature quote and found part of a Lord Byron poem: "There is a pleasure in the pathless woods, there is a rapture on the lonely shore . . . " I quickly decided where to put the words on the pages and wrote them in with a white Bruynzeel pencil. I'm happy with the writing, surprisingly enough. I wanted it to look rustic and as though someone had written with something they'd found on the forest floor.

Then I used the set of leaf stamps by Hero Arts that I so miserably failed at using last night with the Jacquard Castaway stamp pad (don't use Castaway on brown kraft paper) and stamped using Archival Ink Sepia. I had no problems or doubts about which image to put where. I am very pleased with the result.