Showing posts with label journaling. Show all posts

22 January 2012

A good week

Well, it has been a good week.  Fun, creative, and productive.  I am proud of myself for doing what I said I would do--got "in the studio" by 8:30 a.m., which also stopped me from going back to bed and wasting the day.  I also managed to avoid floundering about what I wanted to do, thanks to all the thinking I did in the last couple of weeks about what I hope to achieve this year.  I've got goals!  :-)  

These first pics are of the little book I cut pages for last week, mentioned in my last blog post.  I made covers for it from white presentation board.  So far I have decorated only the front of the front cover, but I was pleased with it.  The tree is from a KaiserCraft wood piece (used as a mask), and the rest of the materials used include Adirondack Color Washes, thin Prismacolor markers,  Distress Ink pads, and Sharpie poster paint markers.

I love trees, with or without leaves
Last night while occupying myself in the lobby of the Brushy Creek Community Center during the kids' taekwondo classes, I put myself to work using some of the doodle ideas from Traci's Strathmore workshop on one of the inside pages.  It was fun!  I mainly used a Micron pen, but there are a few bits of a blue Sharpie poster paint marker as well.  Adding the border transformed the page, and also I noticed again how extremely useful Zentangling has been for helping me doodle.  I do remember that I used to *love* to doodle when I was in high school and would draw loads and loads of different sizes of circles on pages . . . need to get back to that.


Doodle close-up
Another thing I am really quite pleased with is that I did something new this week:  carved my own stamp!  Traci Bautista's Strathmore workshop had me thinking about this yet again, as I have many times before, and then when I was wandering around Jerry's Artarama early last week I noticed that they had a new kit by Speedball for stamp carving.  Clearly a sign that I was meant to get it and do it!  It is one more way for me to make my art my own.  The kit came with a small piece of pink rubber block, a knife handle and two tips, and tracing paper.  I searched my drawers of stuff for a suitable image and ended up using the top of the palm tree from the Mexican loteria cards (#51).  Traced, transferred, and carved.  It was so much easier than I expected it would be!  I added the lines within the design myself.  It may not look like much to anyone else, but I love it.


On Friday I finally made a decision about what kind of book to make. One of my goals this year is to become much more familiar and practiced with different book structures. Often I get bogged down in aspects of that which I think I "should" do . . . so this time I decided that my goal was simply to practice the book form, and thus I wasn't going to add pressure to myself to embellish or create the perfect cover at the same time.   Voila--unblocked.


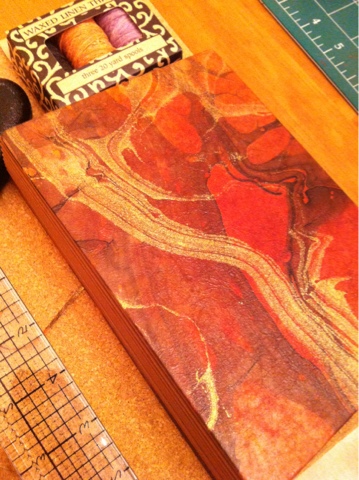
I measured and cut boards, sanded the edges, and cut paper from a beautiful sheet I'd gotten from Hollander's a couple of years ago.  I have found that I have an unsettling & probably unhealthy urge to hoard supplies for the "perfect" use, but I am coming to realize there is no such thing.  So with nary a qualm I pulled out the paper and cut it up for this project.  (With some of the scraps I even made a smaller book.)  I did not yet get to the point of punching holes in the signatures or the covers; that will come this week.

Small boards (3-1/2" square) covered
with scrap from the big notebook
My plan is to do my first caterpillar stitch.  It's not exactly clear to me how one attaches the signatures, since normally one works up from the back cover and this caterpillar appears to go the opposite way, but it did occur to me yesterday that I can do the cover stitching, and when I get to the signatures, I can just turn the whole thing 180 degrees so that I feel I am adding signatures from the back cover to the front.  Hopefully that will work.

The little book came out quite cute.  As the covers are 3-1/2" square, I cut the pages to be 3-1/4" square.  I used many different shades of Archiver's card stock that I thought would look good with the book cover:  kraft, cabernet, pomegranate splash, pastel yellow, carob cream, neutral tan, pear crush, natural, cream white, sugar cream, and fudge cover.  The point was for this to be quick and easy (and not lay around half-finished for weeks or months), so I used my new Cinch 2 that I got in a great post-Thanksgiving Day sale.  Worked great!


Finally, at the weekend I came across the site of Marilyn Scott-Waters, and from it I did the following little cover for a 5x8" ruled pad.  It was easy and took all of about 10 minutes to do, and it gave me some great ideas for making my own.  Plus it is something my daughter will like and also something she can help me do.

Front cover, added to a 5x8"
lined notepad from Office Depot
The inside has a pocket;
I covered up the Office Depot logo
as best I could with lace tape

So upcoming this week I seem to have lots of social engagements and not that many days of uninterrupted creative time.  Thus I am setting goals that I think I can accomplish without pressurizing myself:  do the last week of Traci Bautista's workshop, and complete the caterpillar book.  Ought to be able to get my head around that!

25 January 2011

Reorganizing; Fixing a Perfect-Bound Book; Watercolor Journal with Beaded Spine

As mentioned, I turned my stuff upside down last week to put it back together in a new and pleasing way--then I've spent the last week looking for stuff I cleverly put somewhere new and now can't remember where it is.  I'm getting there though (the last ten percent of stuff is always the hardest!) and am very happy with the effort.

Of course I know I'll do this all again next January, but that's okay--it's a valuable reset for me and an excellent opportunity to think about what I want to focus on for at least the next six months (or rather, until the school year ends for the kids) and arrange my stuff in order to best facilitate that.  I get a chance to be reminded of supplies/tools I acquired during the year and to remember things I got longer ago and had forgotten, plus I look at things in new ways every January since I am still learning and discovering so much each year.

I am nearly done with my journal that I keep talking about here but haven't shown any pics of yet because it's just not quite finished.  Yesterday during my kids' taekwondo lesson I messed around with different ideas for the pockets, and I think I've come to some decisions.  Sometimes I feel so paralyzed with what is, I suppose, ultimately a lack of confidence.  I just want to be so sure before I cut anything, but I am learning that even the mistakes or things that just don't work out can always be used in some other fashion, and reminding myself of that helps break through the weight of inertia.

One other thing I started working on this week is fulfillment of an obligation to my son's school.  They contacted me back in October, saying that one of the Harry Potter books in their library had sections coming out of it, and did I think I could do anything about it?  I said I'd be happy to take a look at it but couldn't get to it until after the holidays.  Well, that time is here, so I hauled it out and examined it.  At first I was hopeful as it looked like the pages were sewn signatures, but I soon realized that unfortunately, what I was looking at was a perfect binding.  I got on the internet and confirmed that the HP hardbacks are just that.  Bummer.

Spine after pages had been separated
and most of the perfect binding glue removed
So I looked through all my books that I have on binding, and nearly all of them said to kiss it goodbye as there wasn't anything to be done to rebind a book originally done with perfect binding.  However . . . Manly Banister did offer one method to try, so I am giving it a go.  Basically, you clean up the spine of the pages, glue them together lightly again, then separate into sections and whipstitch them together.  If there's enough space left in the gutter then it might work.  I figure it's worth a shot since the school has no other options, and it's an interesting challenge.  So far I've cleaned up the spine and glued the pages back together in preparation for separating into sections.  Later this week I hope to separate into sections and punch holes for sewing, then on a long day, I'll settle in and do the whipstitching.  I should know by about halfway through if it's going to work--those Harry Potter books got big towards the end.


Spine after trimming off the ragged edges using my
Purple Cows guillotine, four pages at a time
Finally, today I found myself beset by the paralysis described earlier.  I need a journal with 140 lb. watercolor paper in it so I can finally get around to doing the Pam Carriker lessons from the Strathmore site (I don't think anywhere in town sells the Visual Journals, and I'm too cheap to order one online--plus I thought it would be nice to make my own).  At first I thought about doing the longstitched cover described in real life Journals by Gwen Diehn, but that just looked like too much work, and even after poking through my papers I still couldn't find ones I wanted to use for the covers.

A four-signature book made with Strathmore 400 Series
watercolor paper, 140 lb. (finished size 7.5x11")
So I ended up going with the multiple-signature binding described on pages 88-91 of Alisa Golden's Expressive Handmade Books.  I didn't even put a cover on it--the paper is so stiff that I decided it didn't need one, and it's just for me to play in anyway, not for show.  

(Forgot to mention the paper--yesterday I picked up on 40% off sale at Michael's a 12-sheet pad of Strathmore cold press watercolor, 400 series, 140 lb., 11x15".  I cut the sheets off the spiral binding and then trimmed with my guillotine before making 4 signatures of 3 pages each.  Before folding the signatures, I did turn the middle page of each the other way, so that every spread has the same side of the paper rather than one side being rough and the other smoother.)  

I did add some beads along the spine, just because I wanted to.  Very pleased with the result and looking forward to finally doing the lessons now that I have somewhere to glue my cut-out copies! 

 
Middle section of spine sewing with beads

Top section of spine sewing with beads

28 November 2010

Activities over Thanksgiving week

Must admit I am tired tonight, but a very good kind of tired.  It was lovely to have my parents here and to host Thanksgiving dinner, but goodness I never seem to get a chance to really take a moment and just chill.  The first two days when the kids were still in school I did manage to find some time to work on a few journal pages, and then this afternoon when my daughter was at a birthday party, I went to a coffeehouse and did some more.


One beautiful thing that happened the week prior to Thanksgiving is that my cousin, who lives about 15 minutes away from me, had her third daughter.  I got to hold her from the time she was 10 hours old until she was 12 hours old--nearly made me want a third one of my own!  Such sweet little warm bundles.  The parents loved having her at the birthing center (same place I had my daughter and they had their second one as well) as they were back home within nine hours of her birth.


These are activities from Liz Lamoreux's new book Inner Excavations that I won from Shona Cole's recent giveaway.  I had tremendous fun doing them.


After reading much encouragement from so many different books, and from having fun playing on the mini Buddha board that my mom got for our house this last week, I am determined to try to learn to draw, at least a little bit.  This afternoon I used my new charcoal pencils and drew a tree and a face.  I feel that they are recognizable as such and therefore a success!


Others are just works in progress--although "work" is a grandiose title that's perhaps not quite warranted here.  Last week I used my recent Groupon for Jerry's Artaram and got a small bottle of Liquitex gesso for my portable art bag, so today I experimented with taping off a portion of a page with artist's tape, then gessoing & painting the page before removing the tape.

I will say that I am having huge rewarding pleasure doing these and finding that though I have no idea what's coming, the process allows me to do things that simply wouldn't happen if I were doing a Project or making a Gift, if you know what I mean.

I hope everyone else had a wonderful week, whether it was Thanksgiving for you or not!

09 November 2010

Journal Pages

So today I thought I had this lovely morning + early afternoon to do arty things, and then I ended up doing necessary household stuff (although I did get my most recent post up as a reward to myself just before dashing out of the house).  
packing tape transfer from a catalog
Finally mid-afternoon I had 45 minutes to myself while my daughter was in her ballet class, so I worked on a few more journal pages.
 

Mainly I had some little circles I'd punched out from a magazine ad--I just loved the shade of orange it was--and I needed to do something with them before they got lost or thrown away.  


Then I did things here and there to other pages as I could, nothing fancy since I didn't have a lot of time.  

It felt good to get lost that way for a little while in all the rush of the day.


06 October 2010

Visual Journaling--papers and media

I thought I'd share a little more of my personal "discoveries" (new to me, at least!) and what I synthesized out of all the investigation I did in preparation for my son's middle school visual journaling project.

The first thing I decided needed to be determined was what paper to recommend to the teacher to use. Very quickly I realized that was determined by what media were going to be both available and feasible for the kids to use in the time & space they had to do their pages in. So I quickly had a go at making pages using the following papers:
--Canson XL Series Mix Media notebook (7x10"), which is 98lb paper and recommends itself for acrylic, watercolor, and pen & pencil
--Strathmore 400 Series cold press watercolor paper (9x12")
--Strathmore Visual Journal (5.5x8"), 90lb paper, recommends itself as "great for wet and dry media including watercolor, acrylic, pen and ink, pencil, crayon, charcoal, marker and collage"

Frankly, all of these papers had the problem that they weren't going to fit well into the standard-size binder that the kids were using. I decided to put that issue to one side and just concentrate on the paper, since that could be addressed later.

The Canson Mix Media journal I did not like at all for watercolor, whether tube paints, pencils, or crayons (Neocolor II). Once it got wet, it started pilling, and that was not a desired effect! It wrinkled easily and didn't dry flat like the heavier Strathmore 400 Series paper did. It was fine as long as reasonably dry media was used (markers, pens, colored pencils). I don't even think it would do too well with glue.

I had a lot of fun doing pages on the watercolor paper. It took an UHU glue stick with no problem (carnaroli rice page), walnut ink & acrylic paint also no problem--paper stayed flat and sturdy. The problem, however, was that it is expensive (nearly $10 for a 12-page pad), and I thought the rough surface might put the kids off from a writing perspective. Here they are, not all what I would call "complete":


These are the only two pages I've done in the Strathmore Visual Journal:


Both are done with watercolor tube paints, and the paper holds up great. In the blue one the tissue paper was adhered with Mod Podge applied with a palette knife, and that also is fine. I like this pad much better than the Canson XL Mix Media.

However . . . for my son's class, as much as I was enthralled with either watercolor tube paints or acrylics, I didn't think that was a workable offering for them. Little pots of water to get knocked over, brushes that wouldn't get cleaned, papers that would need somewhere to dry, pricey papers that would need to be continually bought throughout the school year--nope. But I still felt they needed some way to apply color quickly to the entire page, and something with fuller & easier coverage than colored pencils or art stix. I also didn't want them to use anything that required use of a fixative (pastels) or protective sheet to prevent sticking (acrylic paint).

Luckily, I've been busy making lots of Tim Holtz-inspired holiday cards (this is the only occasion for which I make cards each year) and familarizing myself with his techniques for the amazing products he's got. I realized that the Distress Ink pads would satisfy all the requirements for this project. They can be used in the following ways:
--apply directly to paper with the foam pads & handle
--apply to nonstick craft sheet, spritz with water, and make a monoprint
--apply to nonstick craft sheet, spritz with water, and use a paintbrush to apply as paint
--use ink pad to ink up any mark-making object (end of a cork, corrugated cardboard, ruler) and then apply to paper
(I probably missed something, but these are the things I showed the class how to do.) Clean-up requires not much more than a paper towel.

And now that we weren't going to use really wet media for applying broad swathes of color, I could tell the teacher to get a package of heavy cardstock (110 lb) at our local grocery store for about $5 per 150 8.5x11" sheets. THAT is price-conscious!

Other media used in the journal pages shown in this post and the previous one include oil pastels, colored pencils, graphite sticks, Micron pens, china markers, watercolor pencils, watercolor crayons, multiple shades of walnut ink sprays, tissue paper, gel pens, . . . and probably a few other things that just don't spring to mind right now. I really went all out to make sure that whatever I recommended to the teacher to buy was good stuff!

Bottom line regarding paper: if I were going to use a store-bought journal, then I would get either one with at least 120 lb. watercolor paper or the Strathmore Visual Journal. (My moleskine also does pretty well, and it definitely doesn't pill like the Canson does.) If I were going to make one (which is my preference, since book-making is truly what gets me going), then I'd use a combination of hot and cold press watercolor paper plus some heavy cardstock.

Bottom line regarding media: that depends on how mobile one wishes to be. I think the watercolor tubes are huge fun, and I have no problem using them in the hallway of our community center while my son is in his taekwondo class. Seems to me the ink pads would be harder to carry around--they'd need to be in a box so they stay flat. Essentially I think one could use anything as long as you've got the right surface for it . . . just like the rest of the art we make!

I wrote this in response to an inquiry, but it's rather long-winded b/c I also wanted to share my thought process on helping a classroom be successful with this. Please ask if you seek any clarifications.

05 October 2010

Sticking my Toe into the Waters of Visual Journaling


I mentioned in an earlier blog post that over the summer one of my son's teachers asked for my input on a project, and it was definitely a situation where one thing led to another. In the space of about six weeks I did an immersion course on journaling (never something that appealed to me before)--techniques, materials, approaches, etc.

The original mandate was simply to guide them in creating a cover for their notebook . . . but the "notebook" was a 3-ring binder, and I didn't like the chances of plain old Elmer's sticking things onto it that would last the entire school year. After a couple of weeks of stewing and experimentation, I decided to recommend that the kids lay down a base of paper (and then on top of that they could do anything that moved them) and that we use a Xyron to adhere the paper to the plastic cover. That led into all the theory about how to select items that produced a pleasing result, and research about how other people decorated their covers, and of course in those books are all sorts of chapters about the journaling process itself . . . and you can see how one thing led to another. I checked out one book from the library on journaling for children, but it was aimed at younger kids (my son is in middle school), and I bought the rest. I liked all the books I got and don't regret any of them. (We are cutting back on spending now!)

Much of the time at the end of August and first half of September were spent distilling what was contained in about 8 different books into a presentation for the kids so that they would be happy both with their cover and with their pages they do throughout the year. Part of what took me so long is that I had to work through the talk I wanted to give myself at that age so that I could just give them the info they needed and not assume they had my own hang-ups. I think I did a good job--they are all excited about doing pages (this is 10 boys and 1 girl), and they are learning to experiment and express emotions through use of more than words. It's been really exciting to be part of this, and immensely rewarding.

In order to figure out what materials to recommend for purchase to the teacher, I had to do a lot of sample pages myself, since I was not previously a journaler. Words are inadequate to express how much fun I have found it to be! There was a quote in the issue of Art Journaling that I read over the summer that tilted my view of it so that all of a sudden everything came into focus and I understood it--I think it may have been by Pam Carriker, although I am not sure about that & can't double-check at the moment--but it was someone who said that journaling for her was a way of keeping in the creative habit. Wow, I thought, that I can wrap my head around. Before it really just seemed like a waste of time to me; why mess around in a journal when I could actually make something? (Remember I have a 6-year-old daughter and an 11-year-old son; my life is not my own much of the time.)

But after doing these pages that you see throughout this blog entry (some finished, some not) and gaining a more full understanding of the activity, I am completely on board. It is fascinating to see how I do all sorts of things that would never have occurred to me to do on "a piece", and it's just so much fun to play!

30 September 2010

Hodgepodge Journal list booklets


My son's middle school class is going to do visual journaling all year long--how cool is that? The teacher asked me for assistance way back in the middle of the summer, and what began as a limited decorate-the-journal-cover project blossomed into a full-blown study of journaling that then got distilled into presentations for the kids. Did I ever learn a lot!

I'll talk about the journaling more in a separate post, though. Here I want to show the list booklets I made for the kids. When discussing the project with the teacher, we agreed that the first thing to do to give the kids somewhere to start was with a list-making activity . . . and that got me thinking that it would be great fun for them to be writing their lists down in a booklet that started their brains thinking about their own visual journaling pages. Much more inspirational than writing down on another sheet of lined notebook paper!

So one evening while the kids were watching a movie this summer, I set up on the kitchen island with Canson Biggie sketch 14x17" paper and my acrylic inks, and I went to town. It was such a hoot! I made sure to use different color combinations on each sheet and also did the front and backs different ways. Probably I did about 4 sheets front & back.


I decided that the booklets would be 5x5" and sewn pamphlet-style. They would be a combination of the painted papers and plain white paper, but on the plain pages I would add a couple of things--that ended up being one flap that opened up to write on and one envelope with a small set of papers (made from the trimming scraps) inside it.

The end result was 13 booklets that were unique--the kids loved them and were very careful to store them in their lockers when done instead of leaving them around their desks or on the floor.


Finally I decided that I should also make my own booklet so I had somewhere to practice writing on the painted papers with different inks.


Not that I had much time to do it in--this was about 11 p.m. the night before presenting. I grabbed one of the free sheets from a Somerset Studio for the cover, and then I took all the remaining scraps of a decent size and put them on the insides (no pamphlet sewing for me--too late at night!).


I really, really wanted to show the kids how wire could be used, so I whipped up a quick booklet of single sheets and wired it onto the cover. Totally my favorite part! I love the wired-in booklet.


The last thing I did was to stick a packing tape transfer on the cover. I do like it, but eventually I will trim it more closely to the figure of the woman so it doesn't look quite so much like, well, packing tape.